Wednesday, December 22, 2010

A quick trip north.

I didn't intend to neglect the blog for so long. There hasn't been much sewing going on around here. Lots of knitting and a little embroidery, but nothing to share just yet. It was 83° here yesterday. On the first day of winter! Ugh!
I did get to enjoy some cold weather on a quick trip I took to Milwaukee this past weekend. The temperature never got above 23° the entire time we were there. One of my best friends is leaving Texas for a job in Milwaukee and I joined her for a weekend of apartment hunting.

I had never been to Wisconsin, and I have to be honest, the only thing that came to mind when I heard the word Milwaukee was Laverne & Shirley. But, Milwaukee is awesome!

She's going to live in the downtown area, which I thought was clean, friendly, and cultural. Fabulous museums, wonderful food (I recommend the new Glorioso's grocery for lunch and the Pasta Tree for dinner), great shopping, and beautiful architecture.

It was the first time in my life I had ever visited a beach where the sand was covered with snow and there was ice at the water's edge. This was at Bradford Beach on Lake Michigan.

We made more than one trip to the Milwaukee Public Market for lunch, coffee, and yummy sweets. Again, highly recommended.

I'm off to finish my Christmas shopping.  I think I put it off intentionally because I actually enjoy that last minute pressure. Shop on!

Friday, December 3, 2010

Do. Good Stitches. December Blocks

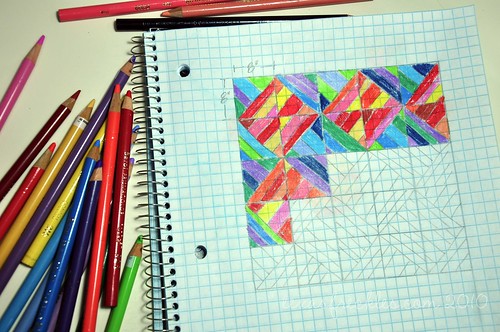
December Block sketch
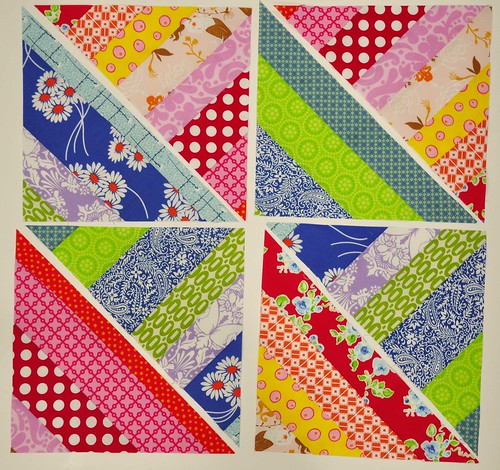
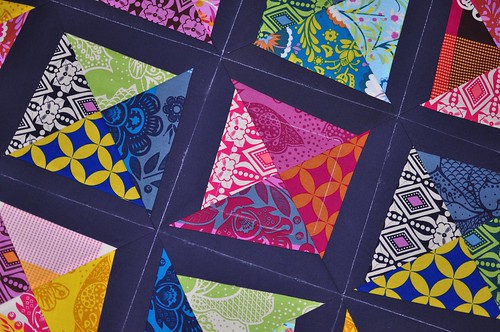
December is my month in the do. Good Stitches {a charity bee} over at flickr. Since December is such a busy month, I wanted to think of something quick and simple. I've been enjoying playing with color lately, so I decided on the blocks above. I put these photos together for the gals in the bee, but I thought I would post them here in case anyone else would like to give these super easy blocks a try.

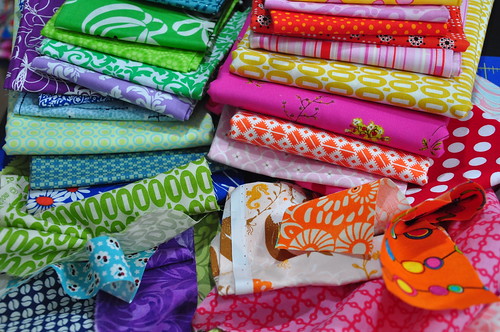
DSC_1251
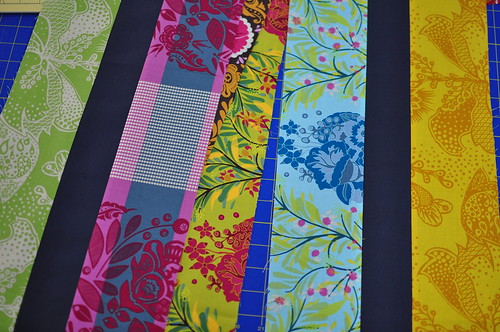
Gather some fabric and cut some strips of various widths (but nothing wider than about 3") and at least 14" long in warm colors and in cool colors. Remember from art class, warm colors are reds, oranges, and yellows. Cool colors are blues, greens and violets. Try to choose scraps/fabrics that have an obvious color feel to them.

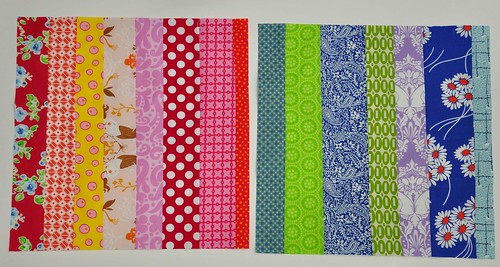
Dec Blocks 1
Sew your warm strips together lengthwise and trim into 13" blocks. Do the same with the cool strips.

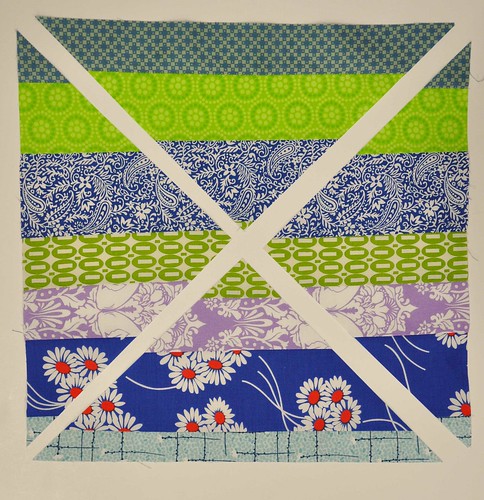
Dec Blocks 2
Cut both of your 13" blocks into four equal triangles.

Dec Blocks 3
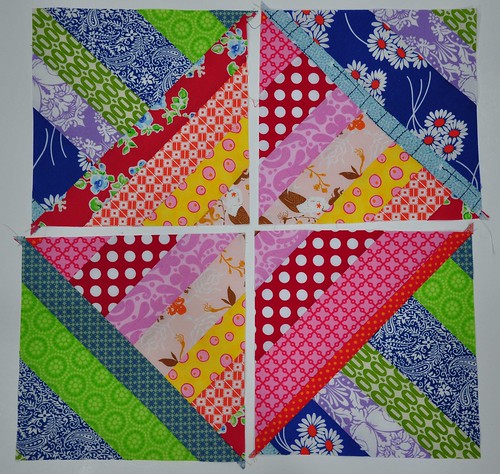
Lay the blocks out as shown above (match a vertical warm to a horizontal cool, a vertical cool to a horizontal warm, etc.) and sew each set together to make four blocks.

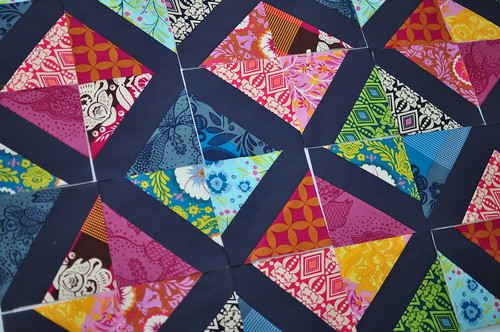
Dec Blocks 4
This is what you'll end up with, four approximately 9" blocks. If you are in my bee group, please don't trim the blocks before you send them to me. If you aren't in my bee, by all means, make some more, trim them up and sew them together!

Monday, November 22, 2010

Getting Settled

What a crazy couple of weeks I've had. The day I returned from the retreat, I began preparing the house for a baby shower which meant unpacking and attempting to bring some semblance of order to my front yard (aka, the mud pit) while the city repaved the street and installed new driveway approaches, curbs, and sidewalks. The shower was Saturday and I think it went off wonderfully and the new street is open and so smooth!

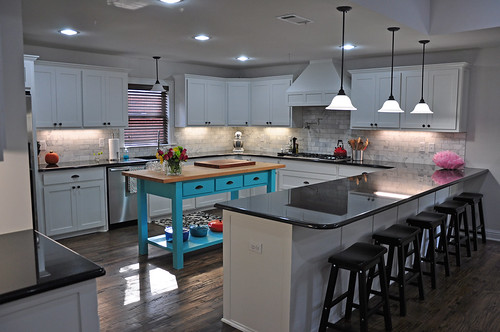
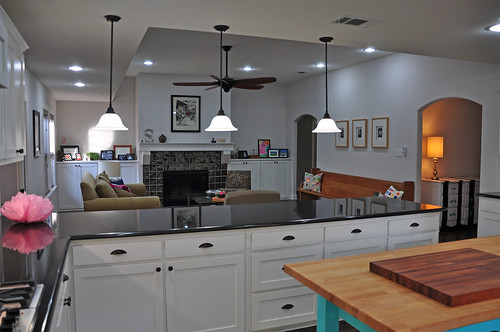
The house still isn't finished, but I thought I'd take a few photos while it was cleaned up for the shower.
The kitchen.

It's open to the living room, which I initially didn't think I would like, but now I think I love.

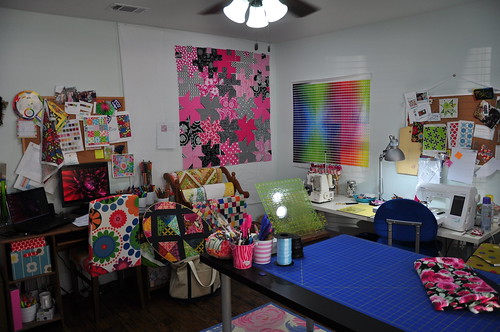
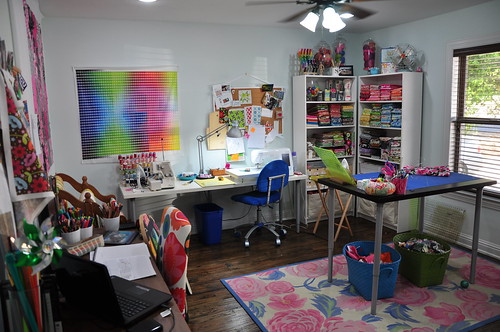
My sewing room is functional and I started on a new baby girl quilt.
(Recognize the pattern, Michelle and Lisa? :-)

I wish I had more free time to spend in here. I love being surrounded by all the color.

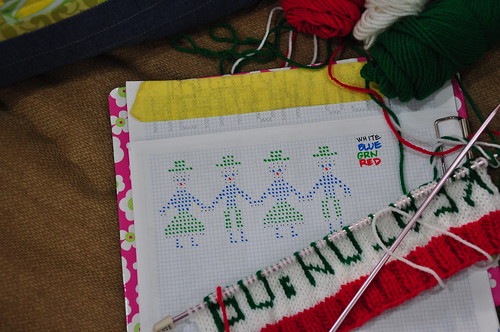
But, I've got a huge stack of new work projects (the kind I actually get paid for which means they take precedence over the fun ones) and a commissioned knitting project (a fair isle Christmas stocking) to work on this week.

At least my house is all cleaned up for Thursday. The family is coming to my house for Thanksgiving!  Who else is having Thanksgiving at their house?

Wednesday, November 10, 2010

Quilting Retreat

I went on my second quilt retreat this past weekend with the Dallas Modern Quilt Guild. On Thursday afternoon, I drove south into middle-of-nowhere Texas to the Compass Centre, just outside a tiny town called Mount Calm. The Compass Centre was built from the ground up as a retreat facility and sleeps about 30 people. They cooked yummy meals for us and kept the iced tea flowing.

Quilting Retreat :: Compass Centre
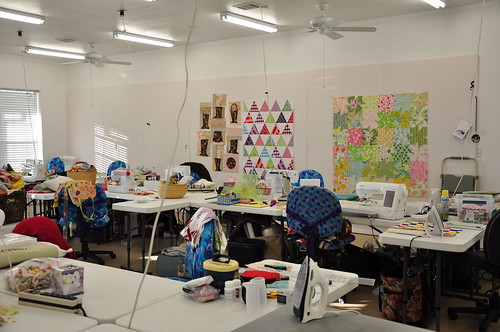
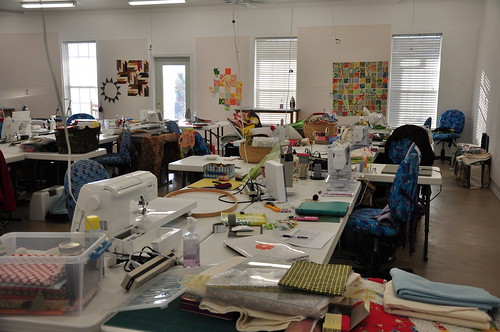
I didn't take very many photos, but here's a look at the quilting area. You can see the work of the talented ladies, Juanita of Settlers Peace and Michelle of Tapestry Tree on the design wall.

Quilting Retreat :: Compass Centre
There are more photos in the DMQG flickr group. This is only about a quarter of the room. The pretty Amy Butler patchwork on the design wall to the right belongs to Lisa of Vintage Modern Quilts.

Freshcut String Quilt
At the retreat, I finished binding a Freshcut string quilt, 

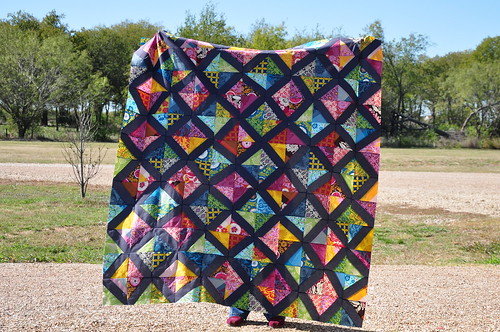
Wonky Good Folks Quilt Top
finished piecing the Good Folks quilt top,

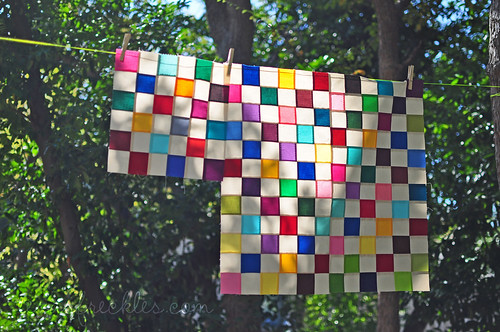
Solid Squares
and started on a new project, my first solids quilt.

I worked on other projects also and left feeling like I got a lot accomplished. It was fun to catch up with friends I hadn't seen in a couple of months and make some new friends too. I cannot wait to get together with that group of creative and fun ladies again! It was a blast, girls!

Monday, November 8, 2010

Life is good...


when one of these is about to open within walking distance of your house.

Saturday, October 30, 2010

Inspiration by osmosis

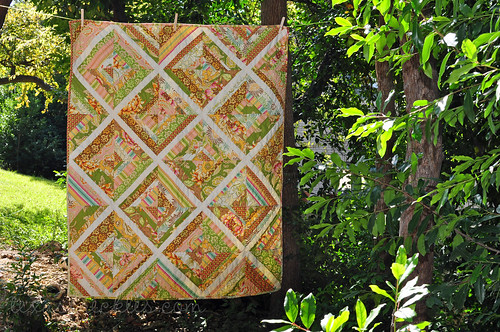
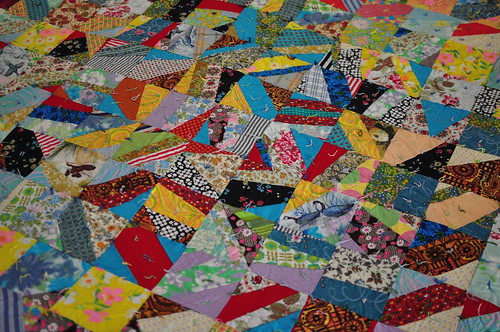
We made a trip to our storage unit yesterday for some of our rugs and I came across one of my vintage quilts. I have a number of other quilts in storage, but this is the only one I was able to liberate yesterday.

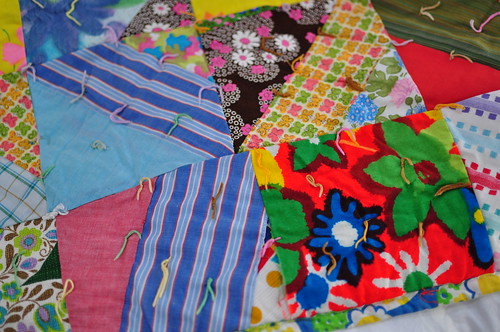
This quilt came from my grandmother's house. My mom thinks it was made by one of my great-aunts on my dad's side. We remember a number of the fabrics in the quilt from various things around mamaw's house, such as one of her kitchen aprons. My mom has a baby quilt of mine that's made from many of these same fabrics and has the same backing. That would date this quilt (and me) in the early 1970's.

It's beginning to feel a little like fall around here, so I placed this folded quilt across the foot of the bed last night and used it as an extra blanket when I got in bed. The entire quilt is very random, but this area made me think of a string quilt. I wanted to sleep in today, but I woke up early with an idea to do a simple, wonky diamond quilt inspired by these blocks. Inspiration by osmosis.

In the sewing room, I had stacked my Good Folks in two stacks, warm and cool, and they jumped out at me as perfect for this project. I spent most of my morning turning these strips...

into this. I asked Sean for his opinion and he said "They aren't straight," so now I'm worried that rather than looking wonky, they just look like I didn't know what I was doing.

I've got some sewn together and I love it. I love it so much that I've already decided to hand quilt it and I think the quilting will emphasize the wonkiness even more (see the chalk lines above). I just hope the wonky looks intentional and not accidental. What do you think?

Wednesday, October 27, 2010

Play ball!

I'm not much of a baseball fan. I have respect for the game and it's fans, but I can't watch baseball. It moves too slowly for me. However, you can't live in Fort Worth right now and be unaware of the fact that our Texas Rangers are going to the World Series. (I'm told this is a pretty big deal?!)

So, now seems like a good time to share a quilt I made last month for my cousin and his wife's new baby.

My cousin is a graphic designer for the Texas Rangers. He's a third-generation die-hard baseball fan and they decorated the baby's nursery with a baseball theme. The Rangers provided all of their front office staff with tickets to all the World Series games. He and guest (who might not be his wife, she's like 36 weeks pregnant) even get to attend the away games on the Ranger's dime (airfare and hotel included.) The home games are like going to work for him since he works at the stadium. Exciting stuff for a baseball fan though.

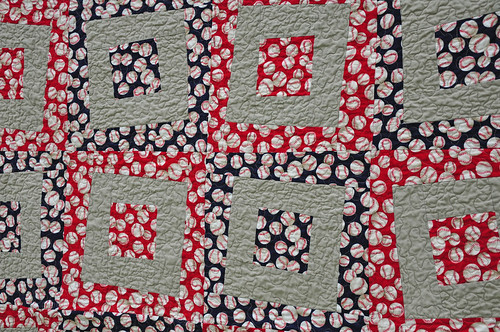
This quilt isn't made with fabric I would normally choose, but I like that it's sports and novelty without looking too, you know... like the licensing aisle at Joann. The print is Alexander Henry and the solid is Kona Stone. I pitched these wonky squares together quickly and they really seem to like it.

The label is my favorite part. I think it turned out cute.

So, that's probably all the baseball you'll ever get out of me. But, I do hope the Rangers do well and score lots of touchdowns in their first World Series game tonight.

Just kidding. I know they score goals, not touchdowns.  ;-)

Friday, October 22, 2010

three words.

I have three words about the new house. Worth. The. Wait.

I've been unpacking since we spent our first night here this past Sunday night.  This is our third massively renovated/rebuilt home and it's a culmination of all the things we learned and loved about the last two houses. I love the location - Our new home is about as urban as we could get unless we moved into a high-rise a mile away in dowtown. Just what I wanted!

I've been working primarily on the kitchen and the sewing room. We've been slowing retrieving our things from storage and still have a few things to do on the house before I can get completely comfortable. I worked on the sewing room until about 3:00 a.m. night before last and made some pretty good progress. The photo above is Wednesday night.

Here it was last night. I still have a long way to go, but I love unpacking and organizing! I can't wait to give you a little tour once things are more presentable. I hate that I've been away so long (there are 4,800+ unread posts in my blog reader and I'm dreadfully behind on emails), but I'm so happy right now I could just scream. Maybe I will. While I unpack.

Friday, October 1, 2010

I can't believe it's October! (And the giveaway winner!)

Thank you for all the well wishes regarding our move! Unfortunately, our house still isn't ready. I would complain about the builder, but he's my husband and I love him madly regardless of how long it's taking. Doing so much of the work ourselves takes longer, but stretches our dollars much further and in the end, that's a very good thing.

I won't bore you with details of our delays, such as of deluges of rain dumped on north Texas by a tropical storm (thanks, Hermine), broken sewer taps and dealing with the water department, or our current foe, the electric company. I won't bore you with the story of my 20 plus consecutive days with a headache, which is now gone thanks to some strong antibiotics for a sinus/ear infection and a round of steroids. (I hope I never have to take steroids again! They made my feel terrible.) Sorry, I guess I just bored you anyway.

We've probably got another week until we can move and I'm anxiously tapping my foot. Living with my mom has really been fun, but I want my stuff out of storage! I packed for about three weeks and we've been here almost six. I can hear my fabric crying out to me from the bottom of a massive stack of boxes.

I'll share a couple of construction shots of my favorite room in the new house, the kitchen!

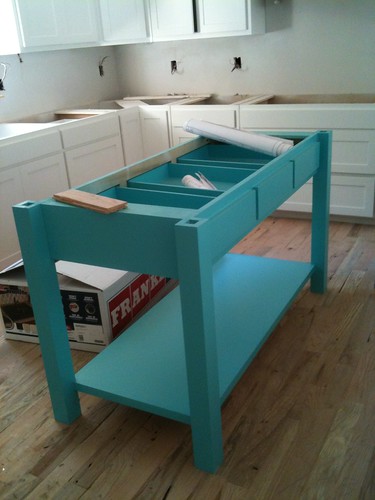
My kitchen island without it's butcher block top and the floors pre-scraping and staining.

A corner of the kitchen with counters (absolute black granite) and backsplash (Cararra white marble). That hood is over the cooktop that still hasn't arrived. I'm so excited about cooking in that kitchen! I officially pledge to eat out less often after the move.

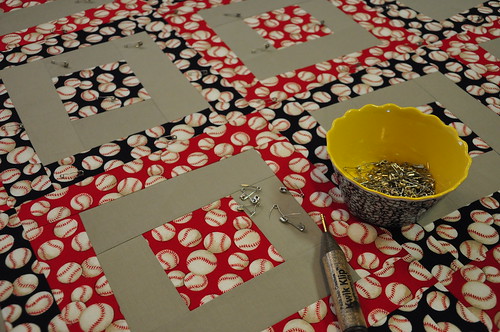
In crafty news, I've almost finished this quick baseball baby quilt for a shower on Sunday. It's not my really my style (sports), but I think it will be a home run with it's recipient. wha wha.

Alright, I know what you are thinking... get to the big news, Mel!

Oh, you mean who I'll be sending this bundle of happiness to?

That would be number 82...

Ashley who blogs at Our so called life!
And, wow, does she have some adorable kiddos!

I'll send you an email shortly, Ashley. I hope you enjoy the fabric!

Well I'm off to run some errands and seal the backsplash tile in the kitchen to prepare it for grouting. If anyone wants to help, come on over!

Sunday, August 15, 2010

A little rambling, a blog break, and a giveaway.

I have a problem. I'm terrible at saying "no".

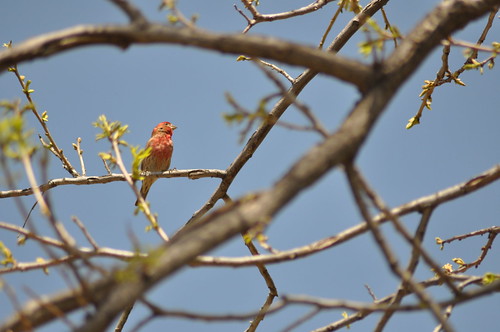
Male House FInch
While I was on the phone this afternoon, having to renege on a commitment, the sweet person on the other end of the line reminded me of the toll never saying "no" can take on you physically and mentally. She told me that she was just like me when she was younger, trying to do it all (and succeeding!), and it eventually caught up to her physically. She shared a scripture from 1 Thessalonians.  Paul told the residents of Thessalonica to "Make it your ambition to lead a quite life..." (1 Th 4:11). My life isn't very quiet right now.

Shea starts school on the 23rd. We have to be out of the house we are leasing on the 31st. The house we are building probably won't be ready until the second week of September. So, we are going to pack and move all our things into storage and live out of suitcases for a couple of weeks in the spare bedroom of my mother's house. We could stay here longer, but it's a 30 minute drive to school from here without traffic and traffic is terrible going into town in the mornings. My mother lives in town, so we think that will make life a little easier for at least a couple of weeks. In addition to all of the packing, moving and driving, I have my freelance work and all of the commitments I've made to keep up with. Oh, and the spike in lumber costs blew our construction budget, so we are laying, hand-scraping, and finishing an entire house of hardwood floors ourselves. I'm tired just typing all of that.

So, for the next month or so, I'm saying "no". I'm taking a blog break. I'll be back once we get moved and settled.

Katie Jump Rope Collection
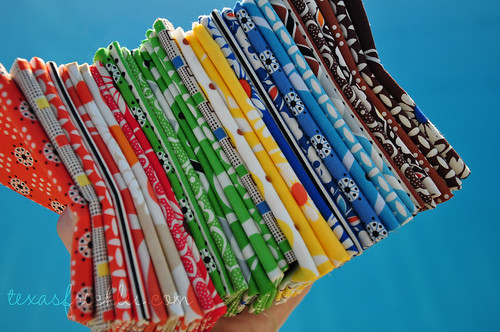
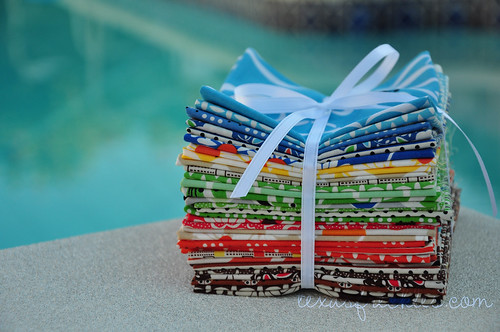
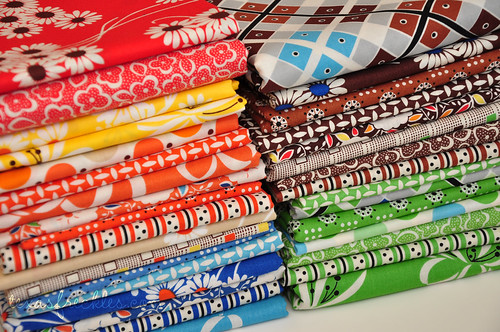
But, I don't want to leave you hanging, so I'm going to do a little giveaway in hopes that you'll come back. I'm going to share one set of fat-eights of my Katie Jump Rope collection. That's 11" x 18" cuts of the 33 fabrics you see above.

Want to win? Leave a comment. No need to become a follower, or Tweet, or blog about it, but if you want to do any of those things, it would make me smile. I'm going to let this one ride for a while; I'll pick a winner when I get back to the blog, mid-September. If your Blogger profile is set to hide your email, I won't be able to contact you if you are the winner, so be sure to check back.

I already feel a little weight off my shoulders. I'm going to try to find some time to read a book I bought last year called Having a Mary Heart in a Martha World by Joanna Weaver. My friend on the phone this afternoon also suggested Simple Living by Jose Hobday, but I'll read that one after I get settled.

Enjoy the rest of your summer and I'll see you in September!

Saturday, August 14, 2010

Quick and Easy QAYG Scrappy Potholder :: A Tutorial

We have a friend (who we'll call Mr. Friend) who likes to tease me about being a quilter and keeps asking me where his quilt is. Tonight we are going to dinner with Mr. and Mrs. Friend to celebrate their wedding anniversary. I still haven't unpacked my projects from the retreat and I don't have time to make an entire quilt, but I thought I'd make them a little quilted gift for tonight.

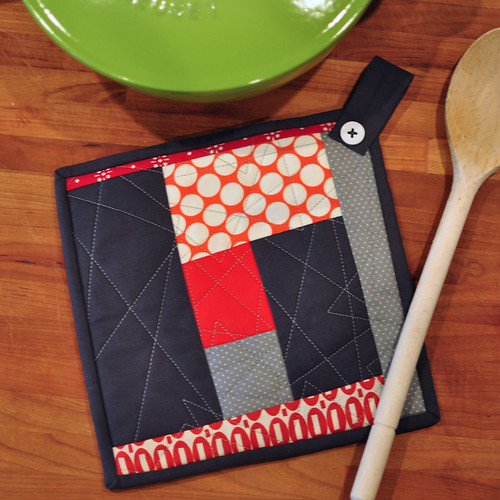
So, here's my quick and easy, quilt-as-you-go (QAYG), scrappy, crazy stitching potholder. I made the gray and red for Mr. and Mrs. Friend last night, and the second one with Hope Valley scraps from my pinwheel sampler today. It's faster without the binding, but either one is pretty quick. I'm going to show you how I made the one without the binding.

Supplies:
  • Two pieces of Insul-Bright batting cut about 2" larger than your your desired finished potholder size. I like a potholder about 8", so in that case, you would start with two pieces of Insul-Bright, 10" square.
  • One piece of cotton batting cut to your desired potholder size. I used Warm 'n Natural.
  • Fabric scraps of various sizes, but nothing too small. Larger scraps = quicker project.
  • A walking foot and a point turner (or something similar).
Choose your first fabric scrap and place it in the center of one piece of your Insul-Bright batting. It doesn't need to be straight, this is all very free-form.

With your walking foot attached, choose a spot just outside the edge of the scrap (on the batting) and sew across the scrap in a straight line. I tended to start near, but not on, the corner.

When you get to the other side, sew off the edge of the scrap, raise your presser foot and spin your batting around and sew back over the scrap. My machine has a nifty pivot function so when I stop sewing, it automatically raises with presser foot foot with the needle down and automatically lowers it again when I begin sewing. This is also a nice time to have a knee lift. 

Just keep sewing from side to side at random angles to attach the scrap to the batting. Try to sew off the edge of the scrap each time. This won't be as important with the subsequent scraps.

Build your patchwork by adding a scrap approximately the length of one side of your first scrap by aligning the edges as above, right sides together.

Attach with a 1/4" seam allowance,

fold it back and press it flat.

Attach the second scrap with random stitching across the scrap just as you did the first scrap. There's no need to cut your thread until you are finished. Just raise your presser foot when you get to the edge, spin it around and keep sewing.

As you attach additional scraps, try to sew off the edge of the scrap every once in a while. This should ensure that your seams won't get too puffy after washing.

You should end up with something like this.

Keep adding scraps around the outside edge of your growing patchwork. I didn't measure anything, I just laid them atop one another and cut. 

In some cases, I attached two scraps together and then sewed them to my patchwork.

In this instance, I sewed three scraps together. No measuring, just eye it and keep going. We want this project to be quick.

You will need to make sure that your new scrap is aligned with the shortest edge of your patchwork. This will hopefully make more sense when you are sewing. If I had aligned the blue swatch with the edge of the green swatch, my batting would be showing above the pink and purple scraps when I flipped it over to press it down.

You'll end up with something like this.

Square it up to approximately 1" larger than your desired finished size. If you want your finished potholder to be 7" square, trim your quilted batting up to 8" square. 

All trimmed.

Make another one using the same technique for the opposite side. *If you would rather make the potholder with the binding, see the end of this post.* 

When you have two pieces trimmed and ready, lay them atop one another, right sides together, and align the edges on all sides.

Sew around the outside edge (still using your walking foot), about 1/4" from the edge. My seam is a generous 1/4". Leave a large opening on one side as shown above, but be sure to sew all four corners. I just sewed in about 1/2" on each corner of the side I left open. Be sure to backstitch to secure. 

Snip off your corners, just don't get too close to the stitching. Press the whole thing flat, concentrating on the seams.

Turn your potholder right side out. Use a point turner (or knitting needle, or something similar) to turn your points. Run your point turner along each stitching line from the inside to make sure your seams are opened all the way out. Iron around the outside edges.

Insert your cotton batting inside the potholder and smooth it out. If it's too big, trim it a little.

You want the cotton batting to meet the inside edges of your seam allowances, not overlap them.

If you'd like to add a hanging loop, cut a piece of fabric about 6" long by about 1 to 2" wide depending on the desired width of your finished loop. I think mine was 2" wide. Press it in half, right sides together. Sew a 1/4" seam along the open edge, lengthwise.

Turn it right side out and press it flat with the seam in the center of one side.

Go back to your potholder and begin turning in the open edge and securing it with pins. This is why I used a generous 1/4" seam allowance. (I guess a generous 1/4" isn't really a 1/4" at all, but hopefully you know what I mean.)

When you get to the end, insert your hanging loop by doubling it over with the seam to the inside and insert it into the opening at the corner. I left about 1.5" hanging out. Iron the pinned opening flat.

Sew all the way around the outside edge of the potholder about 1/4" inside.

You're almost finished! At this point, you may want to slipstitch closed the edges of the side you originally left open for a cleaner look.  I caught all my seam allowances when I sewed around the outside edge, so I didn't bother with it.

You'll want to secure that loose piece of cotton batting inside in case you didn't catch the edges, and I chose a little eyelet stitch my machine does.

But, my potholder was too thick to make pretty eyelets and they ended up being more like wonky ovals. I just laid a small square ruler (I think it was 3") in the center of my potholder and marked the four corners. That's where I put my eyelets. Next time, I think I'll try just taking a few zig-zag stitches back and forth to make a little square of stitching or try tying some perle cotton at those spots.

So, here she is, all ready to go in the kitchen.


QAYG Crazy Scrappy Potholder Tutorial
Here is the one I made last night for Mr. and Mrs. Friend. It's easier to see this stitching on this one. They are big Ohio State fans, so I chose red and gray.

I hesitate to post tutorials because I don't want to put something out there that someone else has already claimed, but I'm a firm believer that there is nothing new under the sun. The quilt-as you-go construction was inspired by the technique that Penny used in her quilt-as-you-go quilt. The random layout and stitching came from my own head, but I'm sure someone, somewhere, has done it before.

*If you want to bind your potholder, you would sandwich the cotton batting inside the quilted squares and bind it as you would a quilt. I added a hanging loop to the bound potholder with buttons on each side. Since I was sure I had caught the edges of the cotton batting on the inside when I attached my binding, I didn't add any additional stitching to secure it, but you certainly could.

Enjoy!